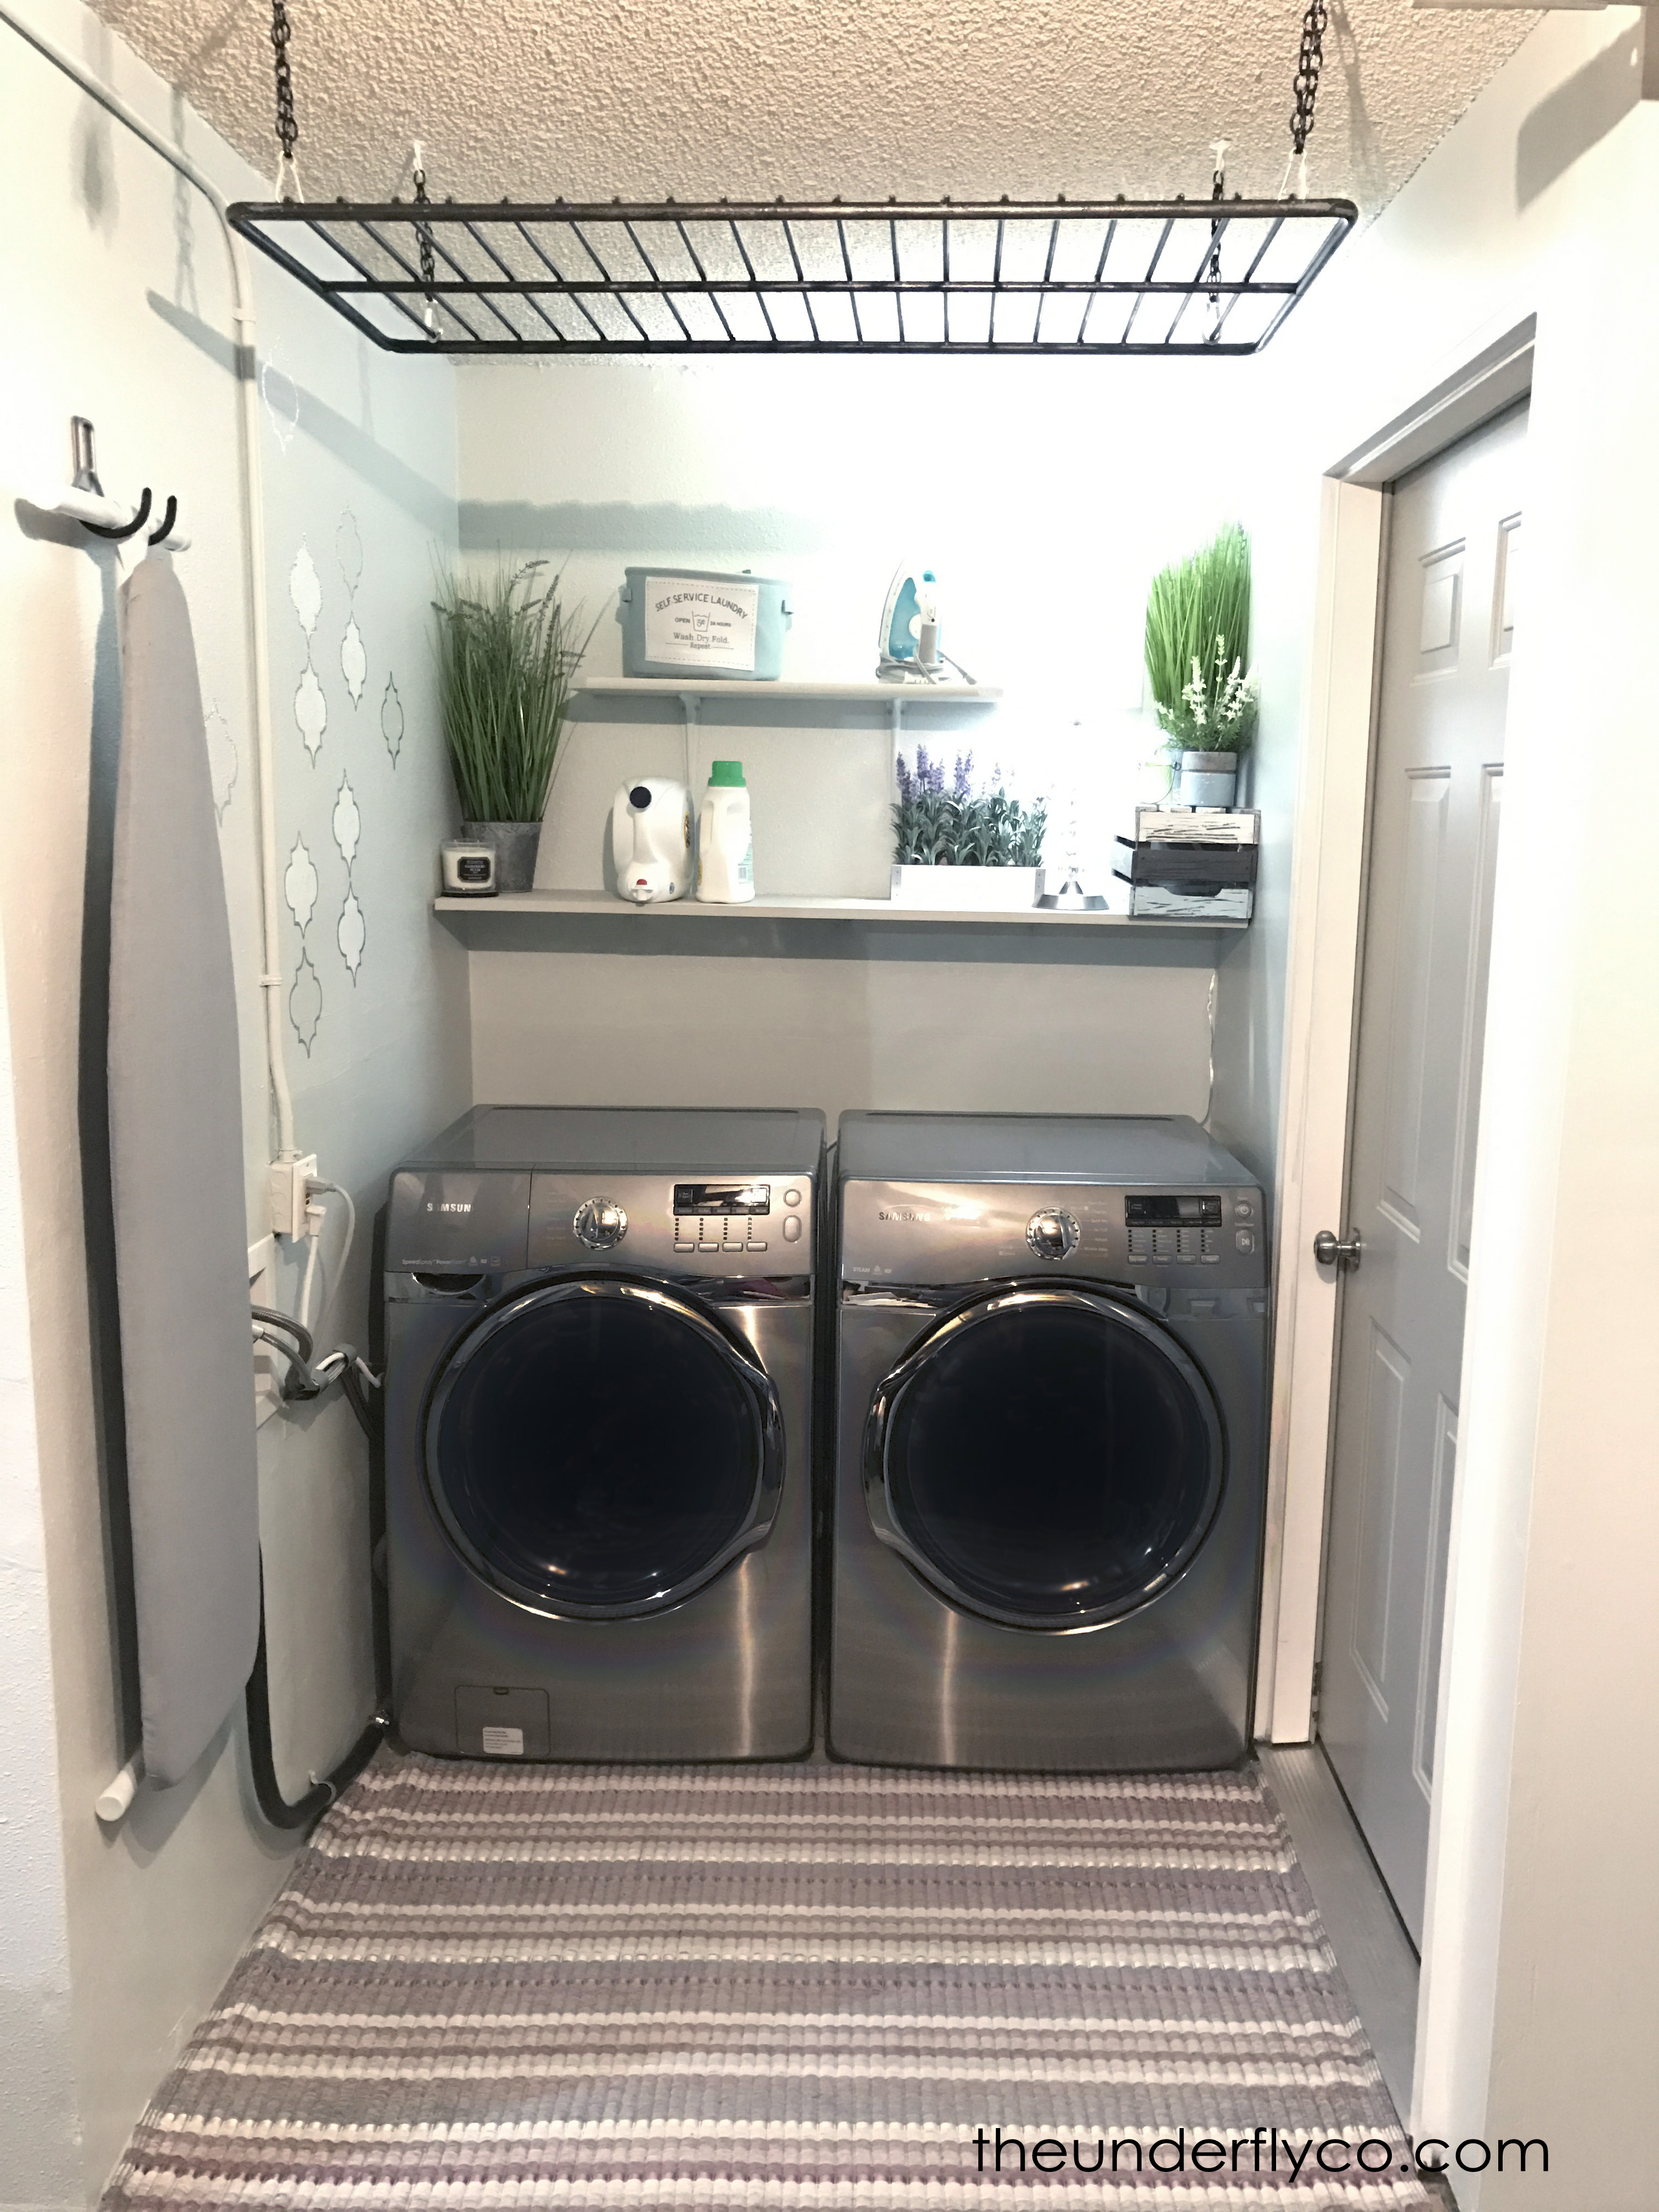

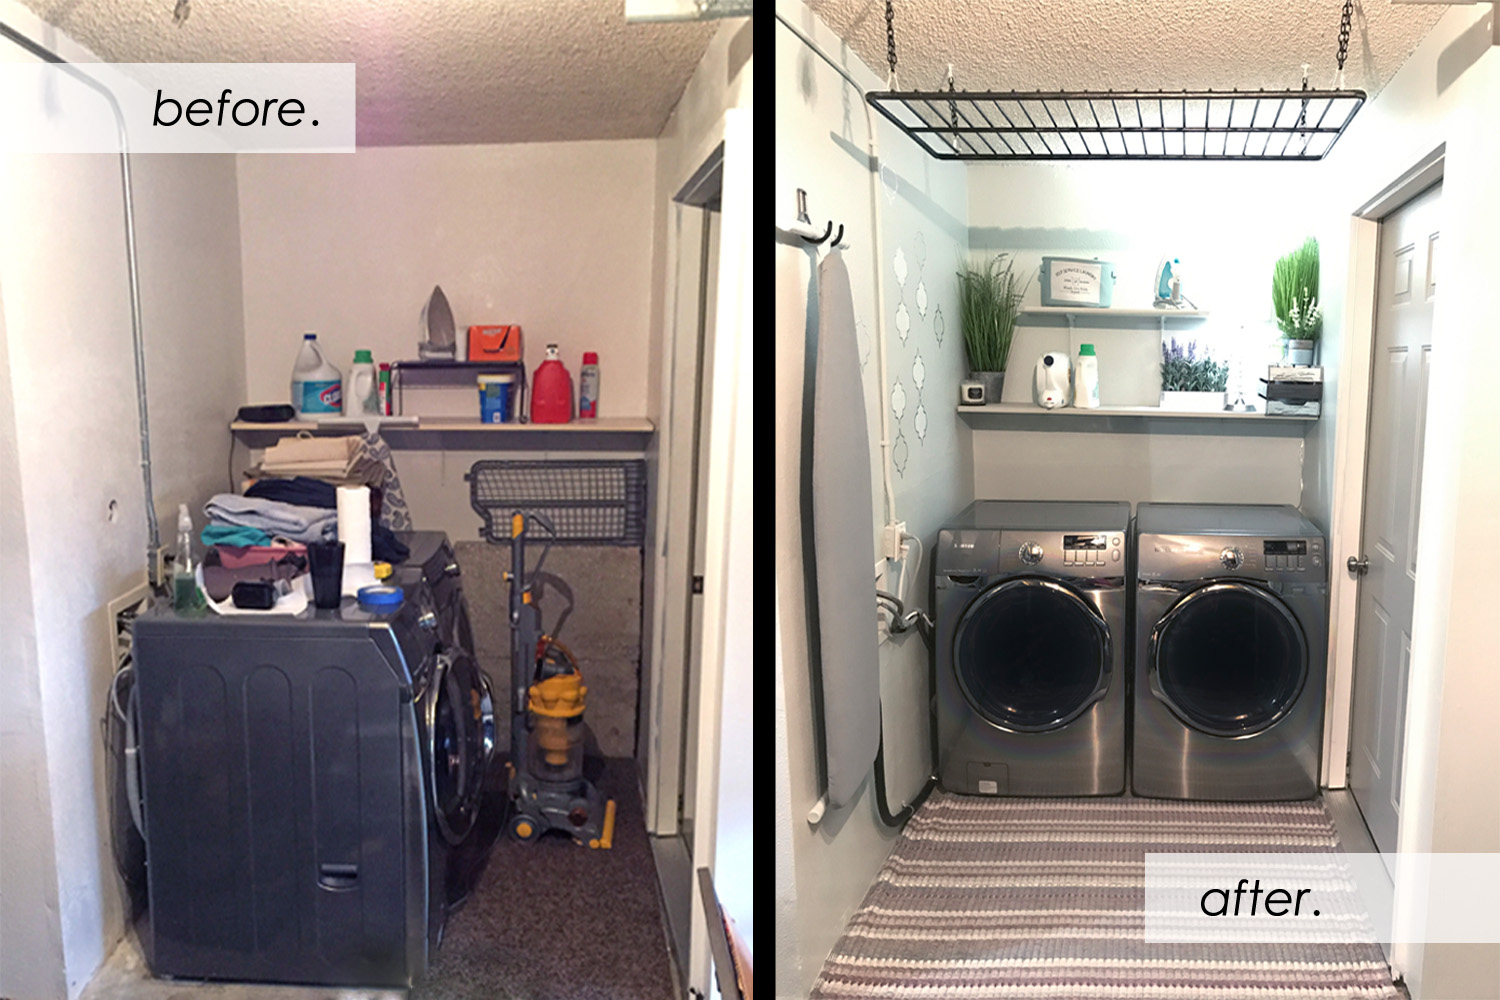
(easy and inexpensive)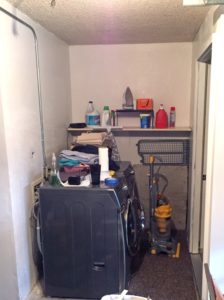

weekend laundry face-lift.
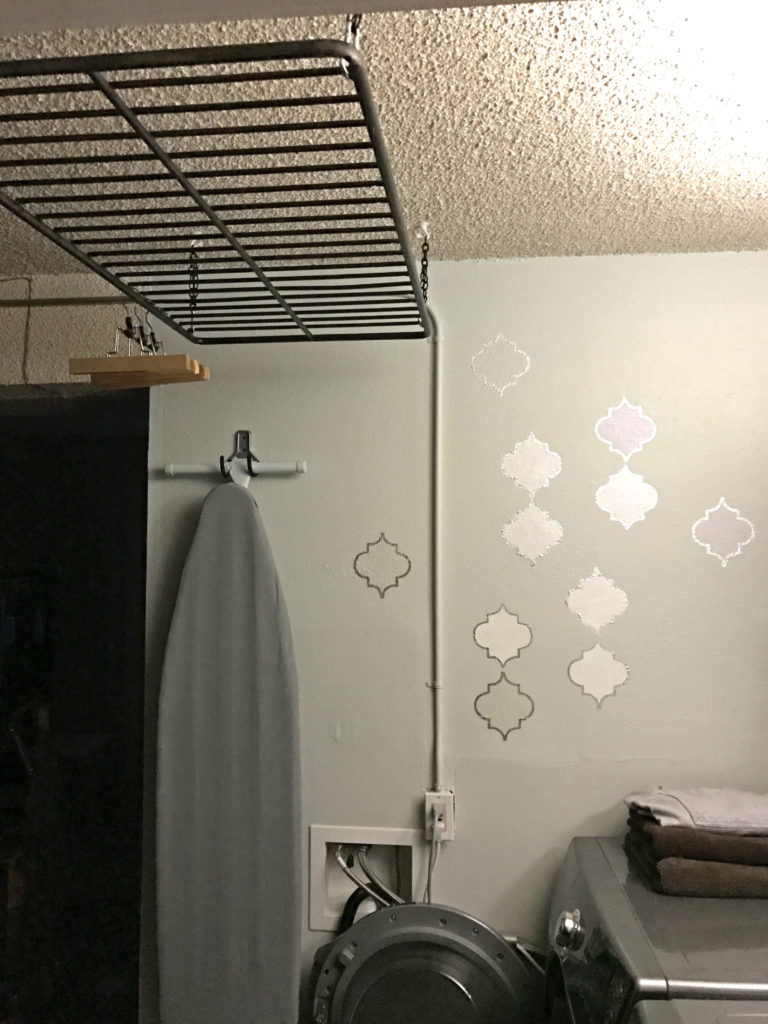
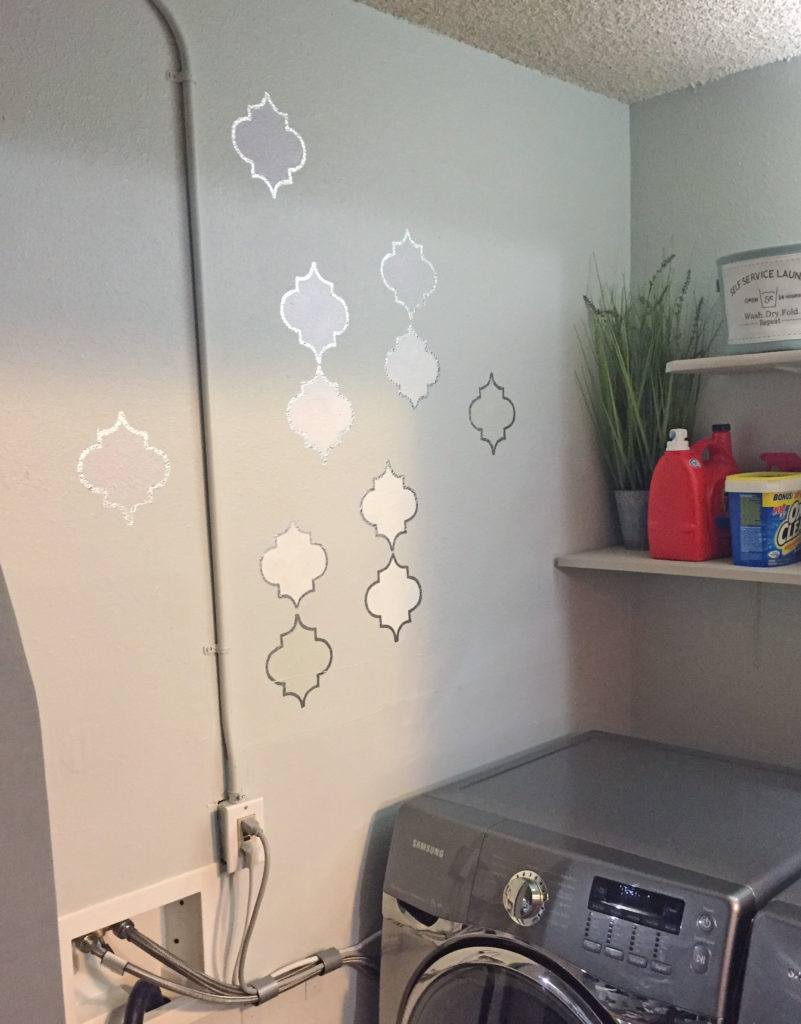
+ wall stencil and drying rack.
- relocated washer and dryer (turned to face outward)
- thorough cleaning
- purchased chain to hang the drying rack, paint and painting supplies, wall stencil, rug, lamp
- applied paint to walls/shelving and wall stencil [great recommendation from an awesome friend, Michelle, over at magnoliasimple.com!)
Small investment, drastic improvement. 🙂
 I used a pre-made stencil, but making a cost-free one out of paper or cardboard would have worked just as well. First, I painted the wall, then after it was dry, I used dots of painters tape to map out where I wanted the
 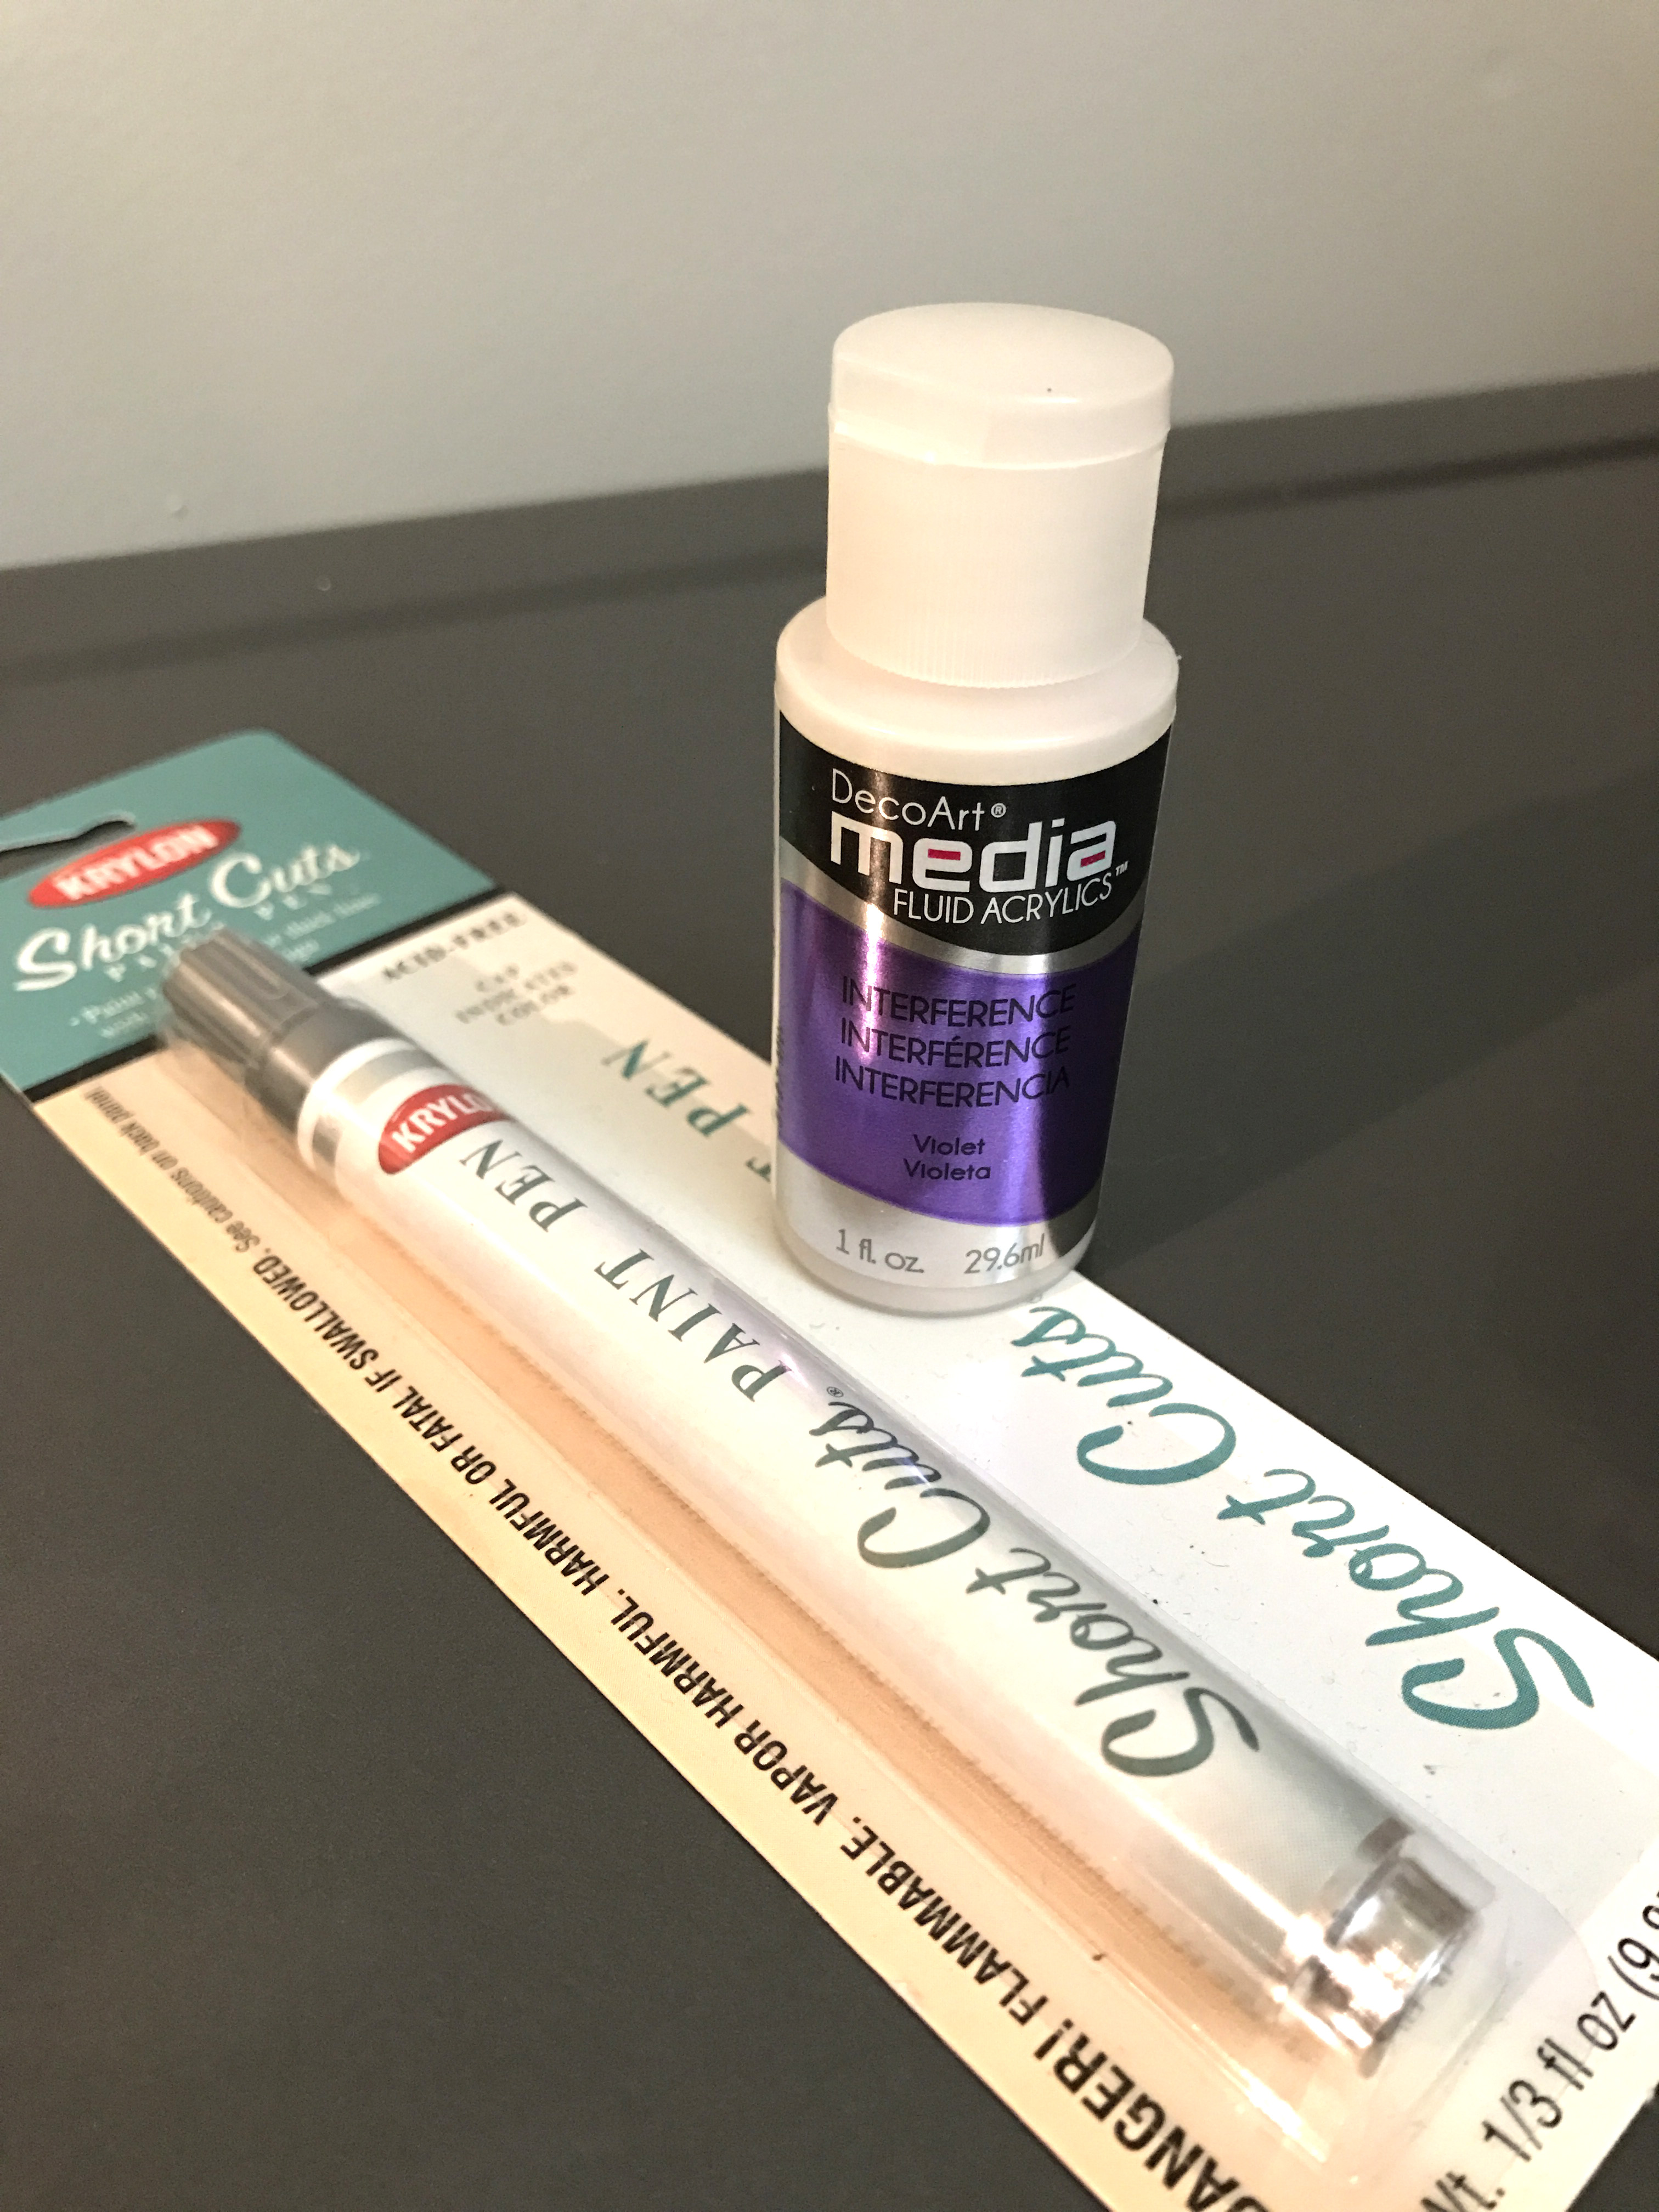 random placement of the trellis stencil shapes. I used a pencil to lightly trace them all out before I did any painting. I used white for some (taping the stencil in place to fill them in) then an iridescent paint to fill in the rest. I also added a second coat with the iridescent paint over the white ones. The end result was the illusion of several variations of purple and green, depending on the angle… which reminded me of soap bubbles!
Lastly, I traced them all with a silver paint pen – SO easy – and went with ease over the wall texture. So much faster than using a small paint brush. Lastly, I painted the existing shelf, also with some leftover paint just taking up space in the garage and re-purposed a shelf from another area in the garage.
I picked up the lamp, rug and some very inexpensive decor from a discount store and found the metal grid I re-purposed as a drying rack at a second hand store – but an old ladder, metal closet shelving or the springs of an old crib would work just as well.


Ta-da!